
Welcome to my fourth Use It! Class.
(If you missed my previous classes, you can find the first lesson of each series HERE, HERE and HERE.)
Just to recap the aim of the class for any newbies: I have chosen a selection of supplies from my stash and every day this week I will share a new card created with these supplies, each featuring a different technique or product. I will give step by step instructions and photo tutorials too. The aim: to use up some of my neglected supplies and encourage you to look back at your own stash and use it up!
Supplies
This week I am using the following products:
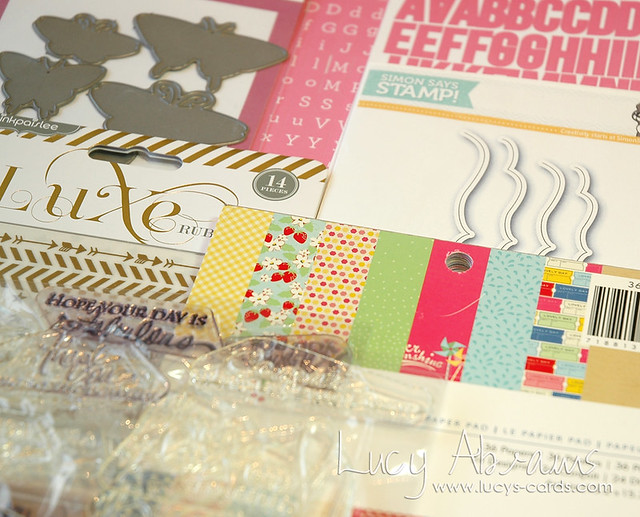
and Simple Stories DIY Typeset and DIY Letters
So, on to the lesson.
Lesson 1: Buttons
Hands up if you have a ton of buttons. I do. I confess, I have neglected my buttons for a long time. Nowadays they are mostly the property of my little Lily. For months they were her favourite toy!! She pours them out of a jar and puts them back in again. For hours.
So today I thought I'd share an idea on how to use up a LOT of buttons on one card. It's a bit time consuming, but perfect if you like to do a bit of crafting while watching a movie or something.
Creation
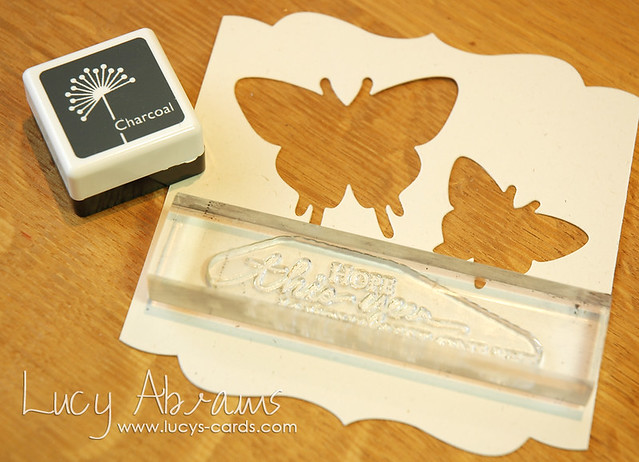
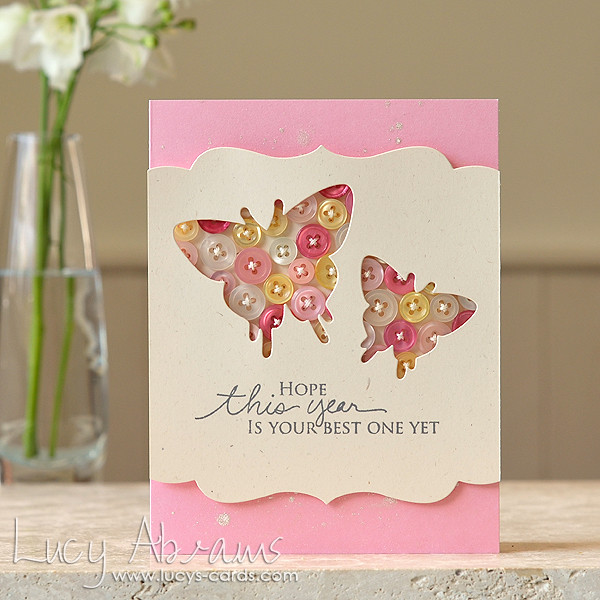
Trim a piece of rustic cream card stock to 4" x 4", then die cut the top and bottom with the Bracket die. It helps to temporarily adhere the die to the cutting mat with some wash tape to stop it moving when you run it through the machine.
Trim a piece of rustic cream card stock to 4" x 4", then die cut the top and bottom with the Bracket die. It helps to temporarily adhere the die to the cutting mat with some wash tape to stop it moving when you run it through the machine.
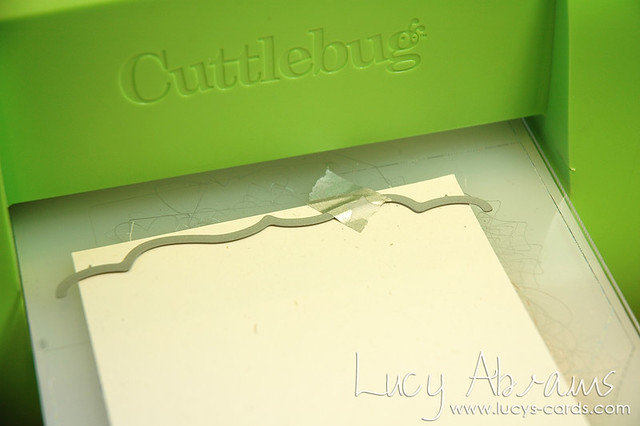
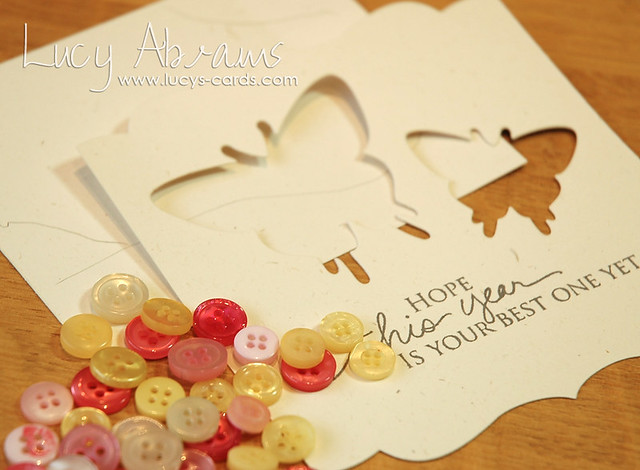
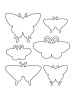
Next, line up where you wish your butterflies to appear, then adhere the dies to the panel with washi tape. Run through your die cut machine. Here I was just checking I had enough room for my sentiment before cutting. Don't worry, I did not run my stamp through my Cuttlebug. :)
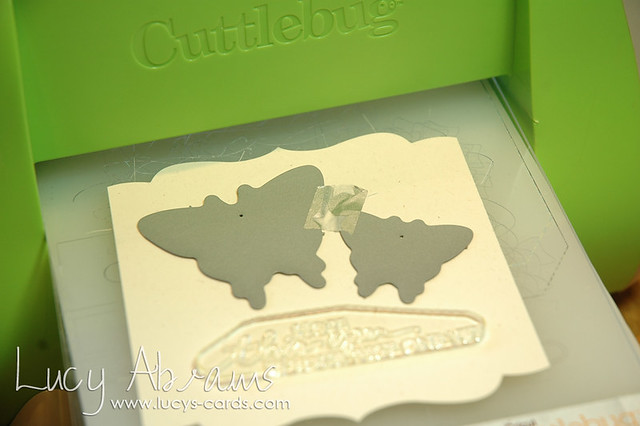
Stamp the sentiment.
TIP: on a vintage-y card, Hero Arts' Charcoal ink gives a much softer effect than black.
TIP: on a vintage-y card, Hero Arts' Charcoal ink gives a much softer effect than black.
Take another strip of rustic card measuring slightly smaller than the die cut piece. Using the die cut piece as a sort of stencil, draw rough pencil lines to mark where the top and bottom of the butterflies are. You will need to fill all this space with buttons.
Select your buttons. I carefully chose buttons with the same slight shine. All my buttons are Papertrey Ink. Love them.
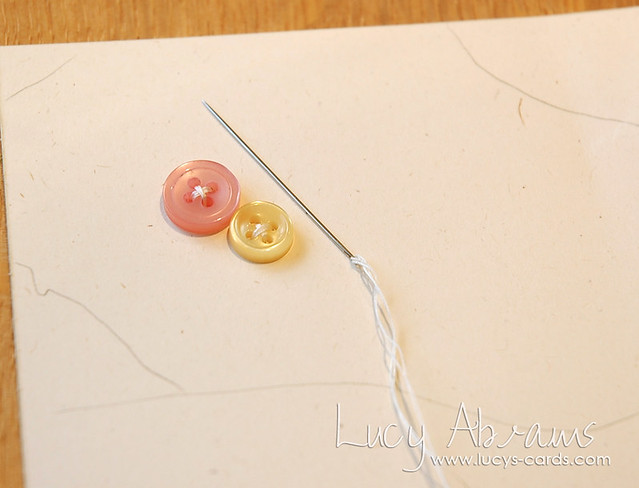
Stitch your buttons to the cardstock panel.
TIP: to save time, thread your needle with two pieces of thread.
TIP: hold the button in place and pierce all 4 holes first. This will save guesswork stabbing and bleeding fingers. ;)

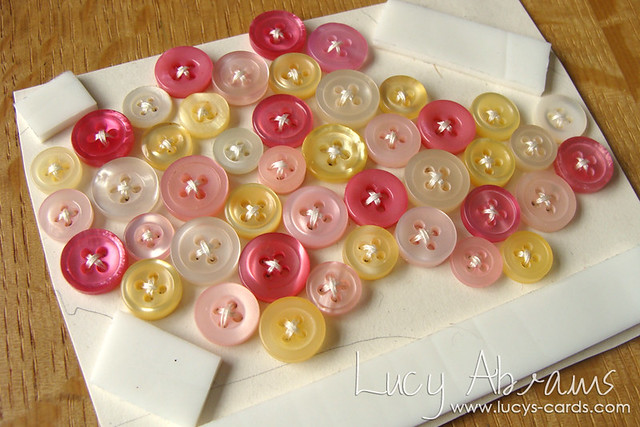
Keep your buttons as tightly together as you can. It will help to have various sizes of button.
Once finished, admire your hard work and try to reconcile yourself with the fact that quite a lot of these buttons will not be seen…!
Add foam adhesive to the leftover card. Make sure it is the same thickness or thicker than the buttons!
Adhere the die cut panel to the button panel. Now you have a pretty window card with lovely button butterflies.

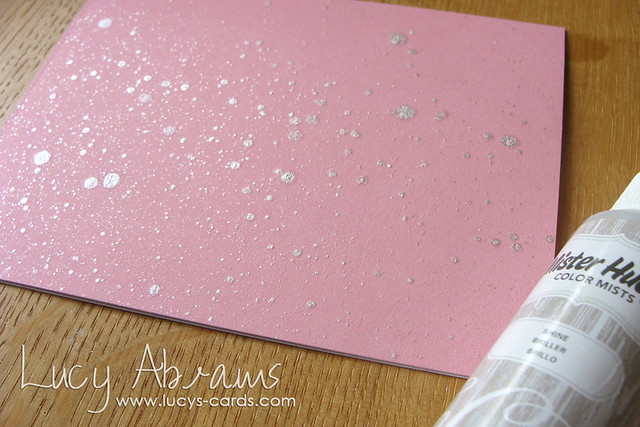
Mist a pink notecard with Calico Shine Mister Huey's and allow to dry. Adhere the butterfly panel to the card.
And that's it! I used up a tiny fraction of my button stash!!! Yay! (I hope Lily does not notice the small dent in her supply…)
So, I challenge you to USE YOUR BUTTONS. It feels good. :)
See you tomorrow for Lesson 2: Rub-Ons.
Supplies


17 comments:
This is stunning. I've made a card similar to this using a lot of buttons but yours is just gorgeous.
How Clever. Im sure I couldn't part with so many buttons in one go though. haha.
Its brilliant. Linda x
Just amazing; I love the soft look you get with all your pretty buttons.
Sooo beautiful! Time to bust out my buttons!
Glad to see buttons making a welcome return to Blogland! Fabulous card Lucy - very inspirational. I've got a fun idea in my head as a result! Jo x
You make it look so easy too. gorgeous x
It's so gorgeous! A lovely way to use up the buttons!!
WTG! This is wonderful. I sure don't have the patience to do it, but it looks good! :)
beautiful card - love the design, the buttons and the brackets!!
I have a ton of buttons! If you need more, be glad to send you some! Seriously!
I have a phobia of buttons, can I be excused?!
Truly amazing! I love how the design came together! I have been neglecting my buttons. Thanks for the reminder!
A-MAZ-ING! Brilliant. Fabulous. Enough with the adjectives. Suffice it to say, I love this card. What a great way to use up buttons. (I have a ton, too.)
Very pretty...love all those buttons in the negative space.
Great idea - the hard work involved in stitching each of the buttons really pays off! Still CAS but with lots of texture and loveliness!
That is really precious
So nice card!! And so great idea!!!
Post a Comment