Wednesday 28 January 2015

Valentine's Bird

Hello.
Today I am sharing a final card I created with Simon Says Stamp's February Card Kit. But I have so much more to use… these kits are amazing value. :)
First, I die cut a tag from some of the Crate Paper Kiss Kiss paper, then I stamped the sentiment from the sweet stamp set. I added the sweet bird rub on to some patterned paper, then fussy cut before adhering it to the tag with some loops of gold thread
Finally, I hand cut a heart from gold glitter paper and added it to my tag.
Valentine's Bird by Lucy Abrams
I love pink and gold together… yum.
Valentine's Bird 2 by Lucy Abrams
That's it for my card kit creations this month… oh how excited I am (already) to see next month's. They just seem to get better and better….
Bye for now.
Supplies

Monday 26 January 2015

Forever and Ever

Hi!
I'm back with another card created with Simon Says Stamp's February Card Kit. This time, I wanted to feature the gorgeous Crate Paper Kiss Kiss rub-ons and patterned papers. And, I wanted to create a non-valentine's card.
So, I made this wedding card, combining a selection of rubs ons with some Simon Says Stamp Moonshine sequins and some tiny silver stars.
Forever & Ever by Lucy Abrams
I completed the sparkly look with some silver stitching. Love all the sparkle. :)
Forever & Ever 2 by Lucy Abrams
I have another card kit creation to share soon - so I'll be back. :)
Bye!
Supplies

Sunday 25 January 2015

Questions… and answers and something new!

Hello! Happy Sunday.

A new venture???
First, I just wanted to tell you about something new I've recently added to my shop I've added a section to my shop with some handmade embellishments (made by me).
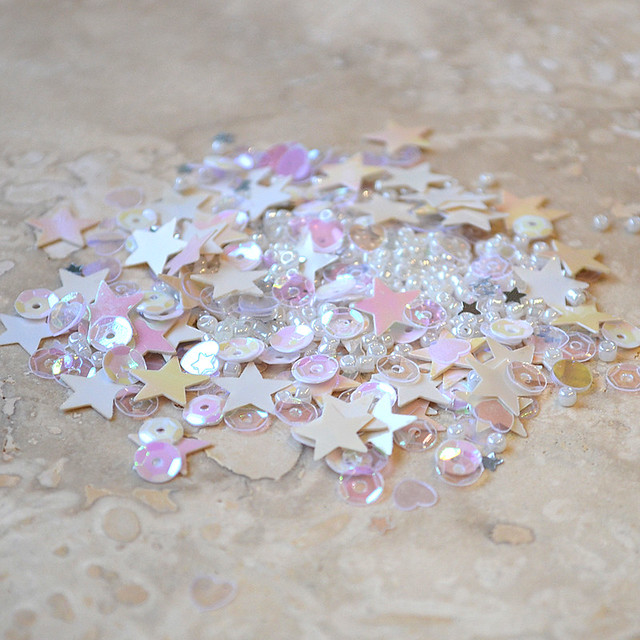
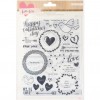
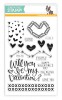
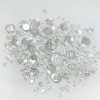
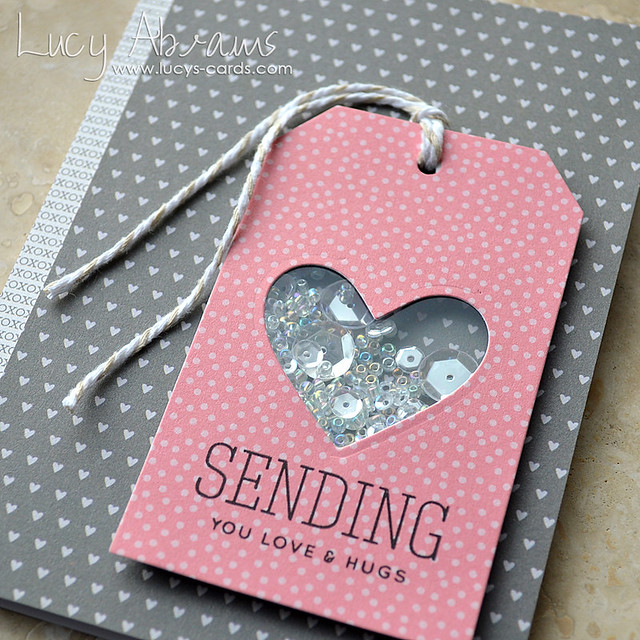
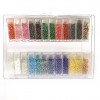
It's no secret that I love making shaker cards, and I really love adding a mix of things to them. I thought there might be other crafters out there who'd like to do the same, so I put together some "Sparkly Shaker Selections". Each pack contains a 6g mix of seed beads, sequins and different shaped confetti to give your shaker cards a different (and super sparkly) look.
At the movement, I am offering Iridescent White. If you like them (and if anyone buys them), I will make some more colours up too.
(I am particularly excited by a rainbow selection I have started planning…)
Here's a peek:
Sparkly Shaker Selection
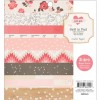
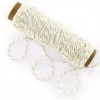
I have a few other things available too, including some fabric and paper embellishments - check them out HERE.
And please note, if you are not in the UK I will still ship to you - I just need to get a quote from the post  office. Just send me an email or leave a comment here if you are interested.


Questions and Answers
Recently I've had a few questions left in the comments section of my blog, and as blogger does not give you the option of replying to comments, I thought I'd answer them in a whole post!

Can you please give a size comparison of Simon Says Stamp's Bundle of Stitched Shapes rectangle, and the Stitched Rectangles dies.
Great question… the one I use to create borders for my cards is the Bundle of Stitched Shapes die. The largest rectangle die and the Stitched Shapes dies are actually exactly the same size, but as the rectangle die has a stitched edge on the outside, this makes the inside frame slightly smaller. Just a few millimetres, but smaller nonetheless.

How did you create the stamped background on the Colourful Flowers Happy Birthday card?
I did this totally randomly. I kind of did it in rainbow order - starting with the large flower in Pale Tomato, then adding the other larger flower, then filling in the gaps with the other ones. When I was done, there were still a few spaces, so I added some tiny green stars. I actually created a much larger sheet than this - then I chose my favourite section and die cut the frame from that bit. This one was a freaky one off for me - it worked first time. I've got a card coming up in the next few days with a similar background technique and it took me three attempts to get it right. :) Sometimes it just works… sometimes it does not. :)

Will you make more videos please?
Ha.
The short answer is no.
But let me explain - it takes me up to 5 hours to create a video. And that is without interruption. My weekdays are spent with my 1 year old and 3 year old. My evenings are spent sketching cards, blogging and planning. And occasionally eating and sleeping. And having the odd conversation with my husband... ;) Come the weekend, when my husband is home, I get to create the many cards I have planned in the week… so fitting in time to make videos is just not possible at the moment, apart from on very special occasions. I am sorry - and I do want to… but for now, I have to prioritise.
Additionally, I find videos really really hard to make… there are so many other people out there making videos that I honestly wonder what more I have to offer.
And that, as they say, is that!

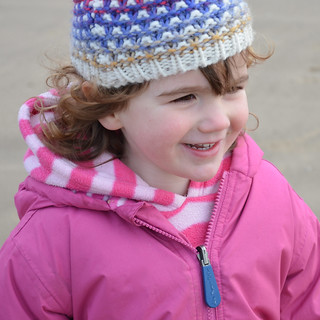
Will you share a photo of your daughters?
I don't really share many photos of my family on my blog - I really keep it for cards. I do share photos on Instagram, but I know many people do not use Instagram. So just for you Gail, there's a little picture for you at the end of this post. :)

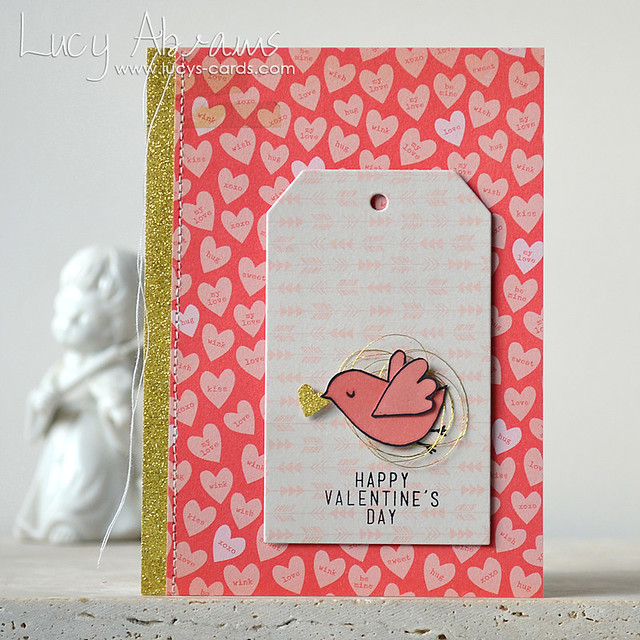
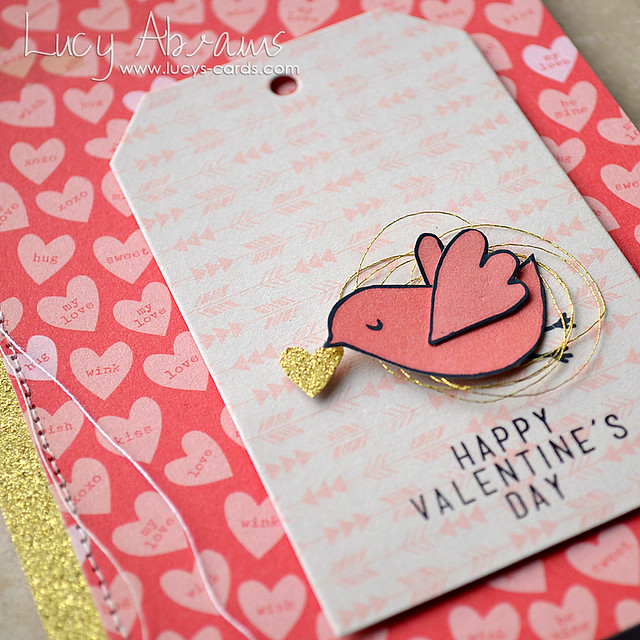
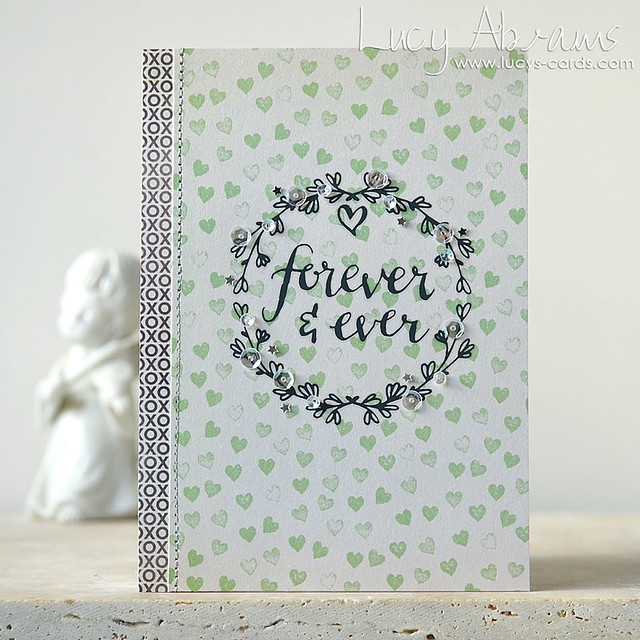
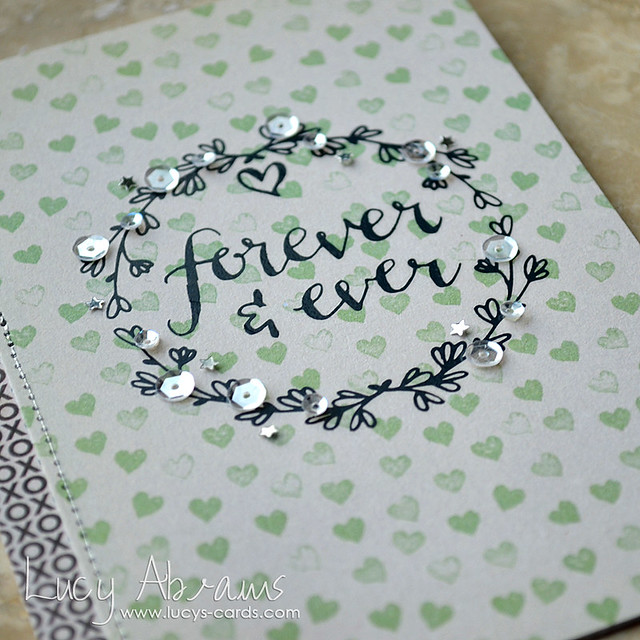
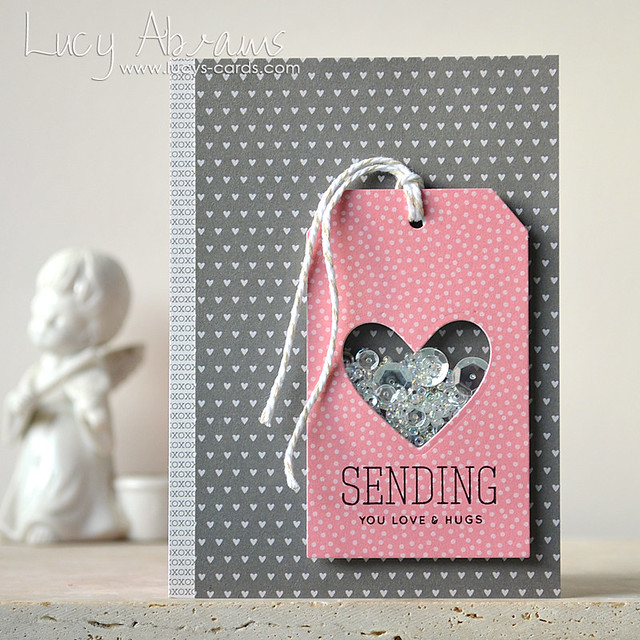
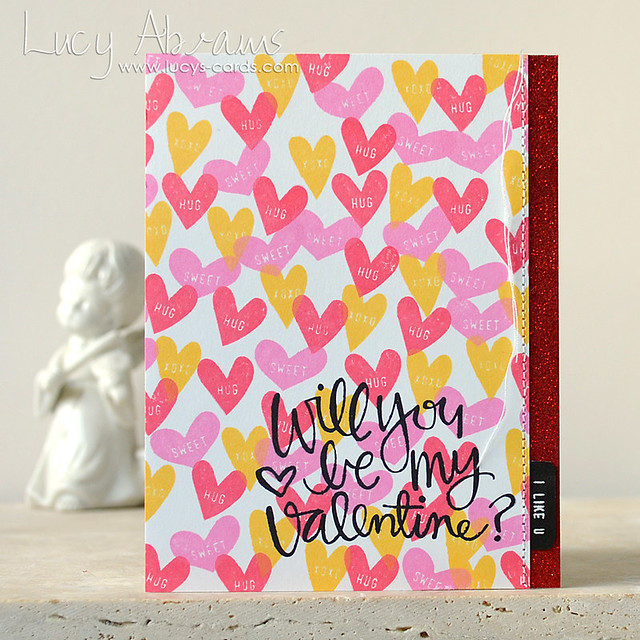
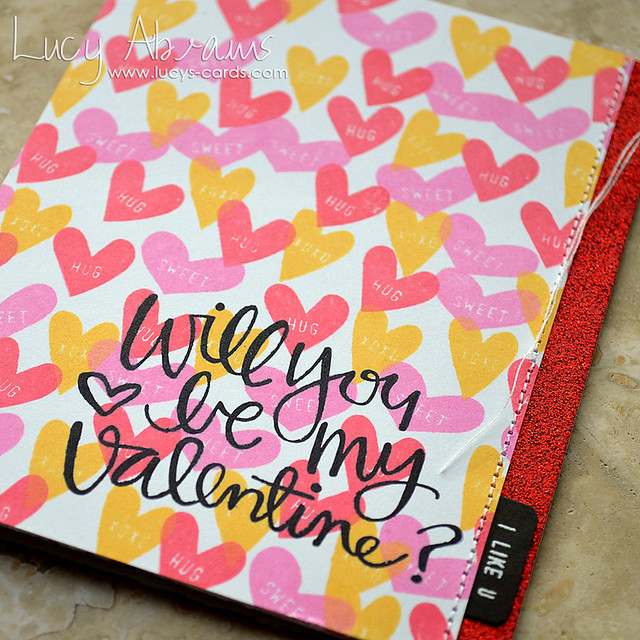
How did you do all the die cutting and stitching on THIS card?
This card was way easier to create than it may look…
I just lined the die up on a sheet of white card and ran it though my machine. Then I placed the die below the first cut, but offset rather than perfectly lined up, and I cut again. Then again… lots of times. This created about five rows of hearts. Then, I stuck it to the patterned paper, and die cut it with a square die from THIS set. No real stitching at all! All fake. :)
I hope my explanation is clear enough… next time I make a card like this, I promise I will do a tutorial of sorts. :)

What do you do with older supplies? Sell, keep or give away.
Well… All three. I have an Ebay shop in which I list some things. I keep a lot… and as my daughter is just starting to enjoy stamping, I am glad I have! I give lots of things to my niece who is a new card maker. And I often have giveaways on my blog.

Where do you get all your ideas?
I eat, sleep and dream cards. Well, OK, not exactly, but I do think about card designs a lot. :) And I keep my sketchbooks close at hand for when inspiration strikes. I have been known to sit up suddenly in bed and sketch out a quick cards design by the light of my alarm clock… But mostly, I am inspired by new products. As soon as I see something new, I am totally inspired and often have more card ideas than I can ever create.

OK - that's all from me for today.
Please leave a comment here if you have any questions I have not answered here. I am always happy to answer questions… maybe I do miss teaching a little. :)
Have a happy Sunday.
x
P.S. For Gail… taken this morning on lovely cold walk along the beach.
DSC_0178 DSC_0168

Friday 23 January 2015

Colouring Fun

Hi!
Today I have project over on the Hero Arts blog. It's a little colouring book I created for my daughter Lily, featuring some of their brand new stamps. And the best part - it was really quick and easy to create!
First, I stamped the new Swanky L onto some Lawn Fawn patterned paper. Then, I used some alphabet letter stamps to spell out 'Colour Me'. Once it was dry, I added some silver stitching to the L, then stuck the panel onto a notecard. I cut some sheets of paper to the size of the notecard, folded in half, and stitched into the notecard down the spine. I concealed the stitching with some lovely silver glitter tape.
Monogram Colouring Book by Lucy Abrams
Lily loves glitter and sparkle, so the silver thread and glitter tape were essential. :)
Monogram Colouring Book 1 by Lucy Abrams
Inside the book are six pages of animal colouring fun, created with the new Playful Animals stamps. I labelled each animal with the alphabet stamps (to give it some educational benefit. I am an ex-teacher after all. Plus, Lily is loving sounding out words and letters at the moment.)
Monogram Colouring Book 4 by Lucy Abrams
It didn't take her long to claim it - she coloured this little guy first, in rainbow colours. She is obsessed with rainbows. I have no idea where she gets that from. ;) And check out her inky fingers. Also inherited. :)
Monogram Colouring Book 5 by Lucy Abrams
If you want full step-by-step instructions on how I created this book, head over to the Hero Arts blog and follow the link.
Bye for now, and have a great weekend.
Supplies


Wednesday 21 January 2015

Sending Love and Hugs


Hello, and welcome to my stop on Simon Says Stamp's Better Together Blog Hop.
You should have arrived from the blog of the insanely talented Nichol Magouirk. If not, I suggest you head HERE to Simon's blog to start at the beginning.
My card today features lots of yummy Simon products, many from the gorgeous Better Together release.
First, I die cut a Large Tag from some Pebbles patterned paper, then die cut the heart from the middle. I used one of the hearts from the Combined Hearts die set - it is the perfect fit for this tag, and a perfect heart shape in my opinion… I really like my hearts to have a symmetry to them. :)
Next, I stamped a sentiment using the (awesome) Sending and Wishing stamp set, then backed the heart die cut with acetate and foam adhesive.
I trimmed my other papers and adhered them to a card, then created a pile of Moonshine Sequins and sparkly Shaker Shack seed beads and stuck the tag on top, sealing the shaker goodness into its window.
Love & Hugs Shaker by Lucy Abrams 
I love Simon Says Stamp's Moonshine sequins - they come in three different sizes which is perfect for shaker cards.
Love & Hugs Shaker 2 by Lucy Abrams
I like the way the background paper peeps through the window too. :)

-------------------GIVEAWAY-----------------
Heidi, owner of Simon Says Stamp, is generously giving away a prize pack on every stop of the hop. Leave a comment here by 23rd January to be in with a chance of winning. And remember to comment on every stop to increase your chances!

Right - it's time to hop on…
Next up is the sweetest girl EVER, a girl with a HUGE heart who can colour LIKE A GENIUS: it's
KATHY RACOOSIN
Enjoy!
x
Supplies


Monday 19 January 2015

Valentine Hearts

Hello!
Today I've got a card to share with you that I created with Simon Says Stamp's February Card Kit. First, let me tell you how awesome this kit is. Cute stamp set, gorgeous Crate Paper Kiss Kiss papers, yummy yummy rub-ons (I forgot how much I love rub ons!!) and so much more. Today's card features the stamp set.
First, I stamped the little hearts randomly all over some Neenah white cardstock using three different inks: Simon's Hot Lips and Hero Arts Butter Bar and Bubblegum. Next, I stamped the sentiment. Then I stamped the tiny 'I like You' in Versamark ink on black card then heat embossed in white. I hand cut the little tab, then stitched it to the heart panel. Finally, I adhered a strip of red glitter card.
Valentine Hearts by Lucy Abrams 
More proof of the beautiful smooth finish created by these inks - Hero Arts and Simon Says Stamp make the best inks...
Valentine Hearts 2 by Lucy Abrams
OK - I have more to share with this kit. I'll be back soon.
Bye for now.
P.S. Have you noticed an increase in me using coloured inks?? That's because I finally organised them into a good storage solution and can see them!! Awesome!
Supplies