
Welcome to day 2 of my digi tips week.
First, I thought I'd offer a downloadable PDF of yesterday's tutorial. HERE is a link to the file. You should be able to download and print it if you wish. Let me know if you find this useful and I'll do the same with today's information.
Today I'm going to talk about simple recolouring and layering of digital stamps.
I am working with Word 2008 - I am not sure if these features are available with earlier versions...
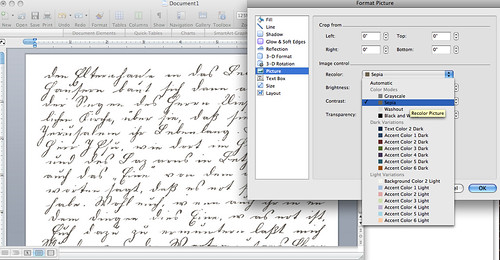
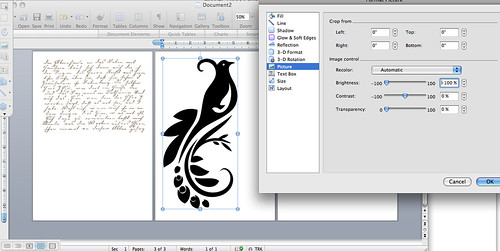
First, I imported the Old Letter Writing stamp into my word document. Now, for my card, I decided I wanted a watermark effect in the background. Altering the image to sepia and printing on kraft gives this effect. (And I love it!!) So, format the picture, and click on 'Recolor'. Choose Sepia from the drop down menu. You can then alter the colour further by playing with the Brightness, Contrast and Transparency.
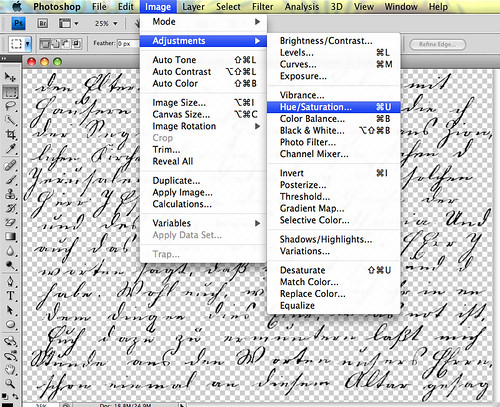
Alternatively, you can do this in Photoshop. I am using Adobe Photoshop CS4.
Once you've opened the image go to Image, then Adjustments, then Hue/Saturation:
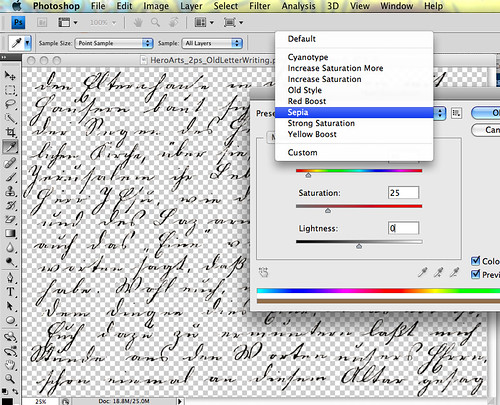
Click in the Presets box and select Sepia from the drop down menu.
If you want to make it lighter, play with the Lightness:
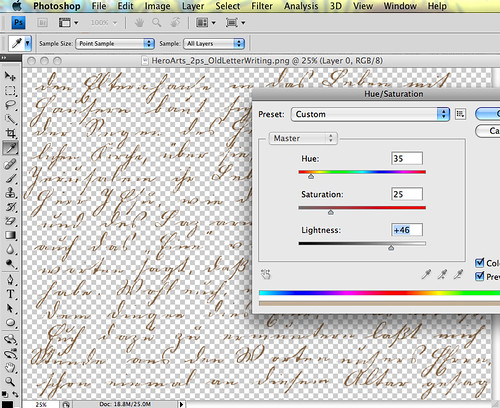
Back to the Word document...
I resized the image to fit a Hero Arts 5 1/2 x 4 1/4" notecard.
If you want to make it lighter, play with the Lightness:
Back to the Word document...
I resized the image to fit a Hero Arts 5 1/2 x 4 1/4" notecard.

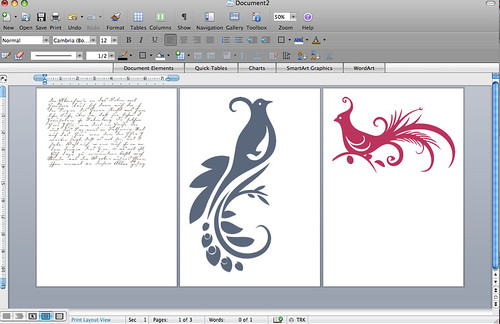
Then I imported my 2 birds. both from the Bird Flourish Thanks digikit. As you can see, the originals are huge, and coloured. I need to recolour and resize them for my card.
So first, I went to format picture, and I played with the brightness - altering it to -100%. This made the bird black.
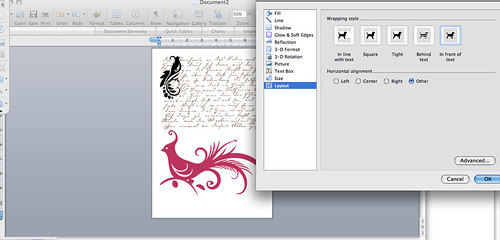
After resizing it, using the same method as described above, I clicked Layout and changed the image to In Front of Text. This is necessary for layering one stamp over another.
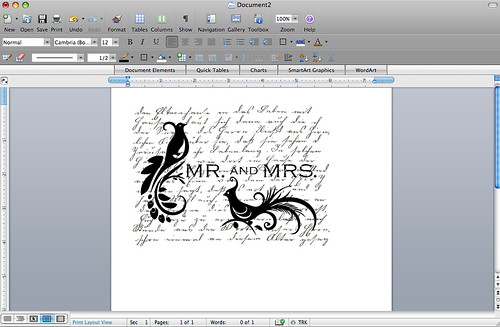
I repeated the process with the other bird and the sentiment, moving them around on the page until I was satisfied. This is another pro of digi stamping - no wasted paper due to wonky stamping or mis-judgements. :)
Once satisfied, I printed onto kraft card.
So very simple :)
Oh, and make sure you leave it to dry for a while before stitching or distressing etc. The ink can run otherwise which is really annoying!!
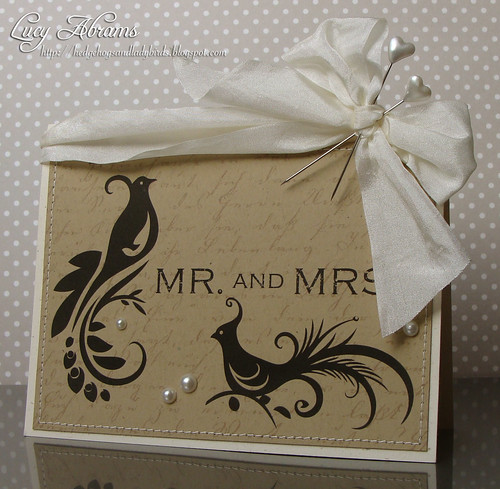
And here is the finished card featuring Old Letter Writing, Respondez Vous and Bird Flourish Thanks. I embellished it with Hero Arts pearls, lovely silky crush ribbon and some pretty pins from The Ribbon Girl.
I hope someone somewhere finds some use for this. :)
Back soon with more. Let me know if you have any questions. I am compiling them for later in the week :)
I hope someone somewhere finds some use for this. :)
Back soon with more. Let me know if you have any questions. I am compiling them for later in the week :)
Supplies
22 comments:
Beautiful card and a great tutorial! :)
FABULOUS tutorial, Lucy!! Love this charming card!!
Lovely card, Lucy and a very helpful tutorial. I hope you can 'pdf' these digi tips as well.
I don't know how to do digital cards and have never tried it (and I have a Mac) but I LOVE this card! The techniques are very cool and the card is wonderful! Thanks so much!!!
You are so good at this, Lucy! Amazing the way it turns out on your card - just beautiful!
Thanks Lucy for all your help doing these tutorials, I'm relatively new to digi stamping so your help is greatly appreciated.
Thanks for the tutorial Lucy! I think a pdf of all your tips would be greatly appreciated :)
Lucy, firstly I love your cards! They are always amazing. I'm also loving the tips you are sharing with these tutorials xoxoxoxo
Hi Lucy,
I'm really enjoying these tips.
I've been wanting to explore digi stamping, and this really helps.
A pdf would be great, thanks.
thank you so much for these tutorials - how did you know I was needing them? LOL, I don't remember telling you.....
Fabulous! Your card looks so gorgeous as usual.
Thank you so much for sharing these great tips with us Lucy!
Sandra ltb
Fabulous tutorial Lucy ~ thanks for the PDF. Made it easier to save into a file on my computer for future reference.
Thanks for the PDF, Lucy! Love what you create!
Lovely card, Lucy. These digi tips are very helpful. You have helped me decide to start playing with digital print. Thanks for clear, easy to follow instructions.
Lucy, my question is so basic, it's embarrassing! I have downloaded my digi papers to a desktop file. How do I get them to Word? I have just been printing them out as if they are a photograph, and can't resize or layer, etc. Question: How do I import the digis from a desktop file to Word?
I can do all you are doing in Paint Shop Pro, but the digi papers are not a png file, so they don't work in that program.
This is such a great idea, Lucy, and must be time consuming for you! Thank you so much. Judy
Flickr mail me if it is easier!!
love your tutorials and your cards.. so useful...please keep them coming!
Dee x
Great idea with the pdf, I like to have this kind of tutorials "on paper". Very nice cards!
I really love the tutorials you are sharing! Thank you for taking the time to create and share these.
Such an elegant card and thanks for the tutorial!!
Stunning card!!
Great tips, thanks for sharing, and will try something today. I have so many free digi scrapbook kits I never do anything with and I think this will be perfect.
Post a Comment