
I'm back with my 4th lesson of my 3rd Use It! class.
This week I am playing with:
Simon Says Stamp's You're Expecting stamp set
Amy Tangerine's Cut & Paste Die Cut Shapes
Lesson 4 - Layering Die Cuts
Lesson 4 - Layering Die Cuts
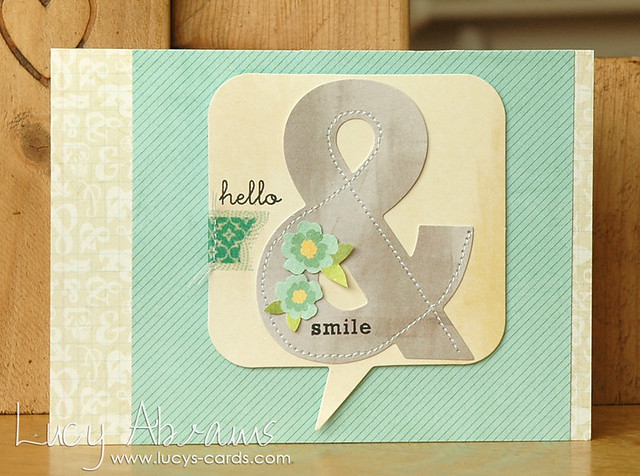
Creation
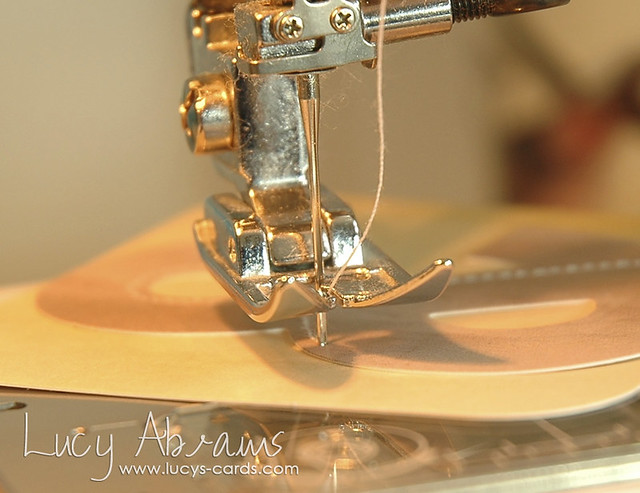
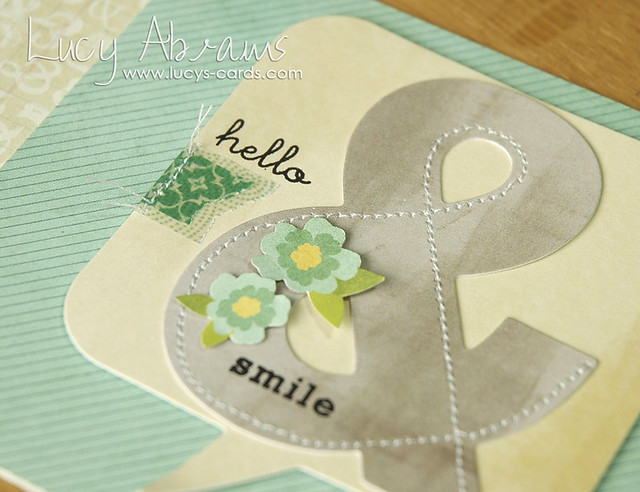
Adhere the ampersand die cut to the speech bubble die cut.

Stitch around one edge of the ampersand.
TIP: when sewing in a circle, life the foot with the needle fully down before turning the paper. This will help you avoid wonky stitching lines. When stitching difficult shapes like this, I often use the handle rather than the pedal. Slow and steady wins the race. :)
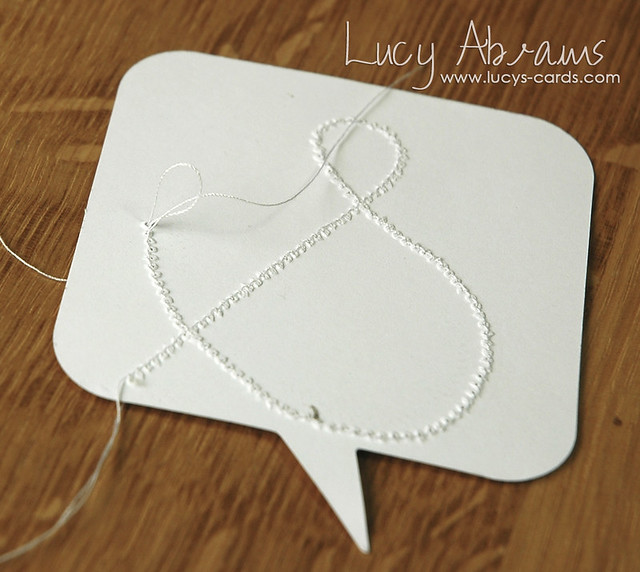
This is what you end up with - the threads are hanging out the front and back.

For a clean finish, pull the threads through to the back.
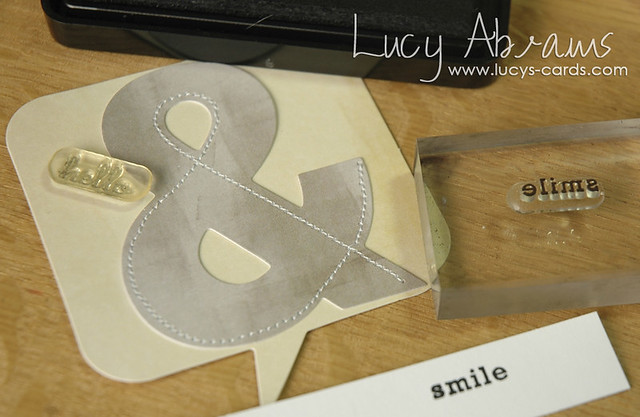
Stamp the words 'hello' and 'smile' onto the die cut.
TIP: when you only have one chance to get it right, I recommend stamping the sentiment first onto some scrap paper to check for a clean finish. I often find fluff from baby wipes stick onto my stamps from previous cleaning, and I have ruined many a card in this way. :)
Adhere some vellum tape to the die cut and stitch in place. Leave the threads loose and trim.
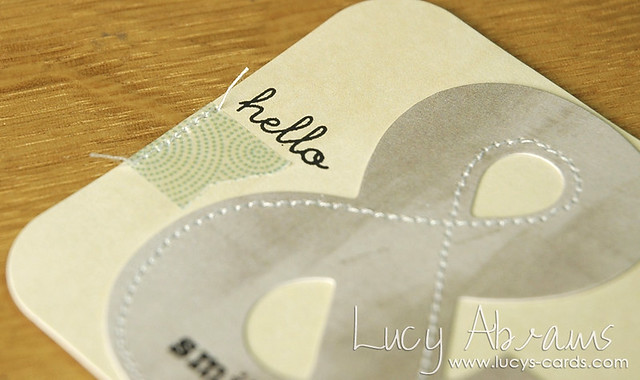
Add more vellum tape on top and another line of stitching.
Trim two flowers from the floral patterned paper.
TIP: for detailed cutting like this you need some good scissors. I use Fiskars Avanti Sewing scissors and I love them. I've tried a lot of different scissors, and these are by far my favourite.
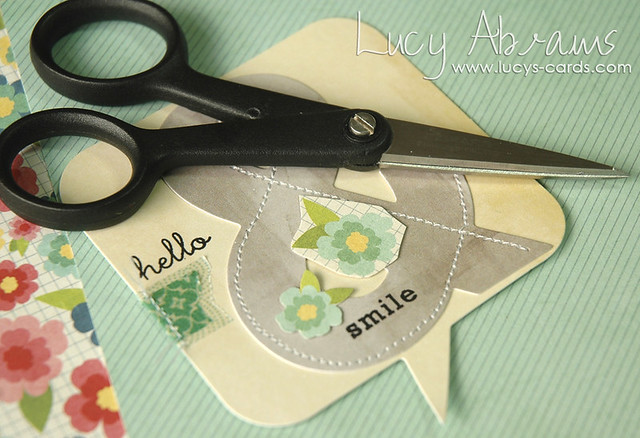
Adhere the flowers to the die cut.
Trim ampersand paper to 5 1/2 x 4".
Trim the turquoise paper to 4 1/2 x 4". Adhere the papers together and adhere to a folded card.
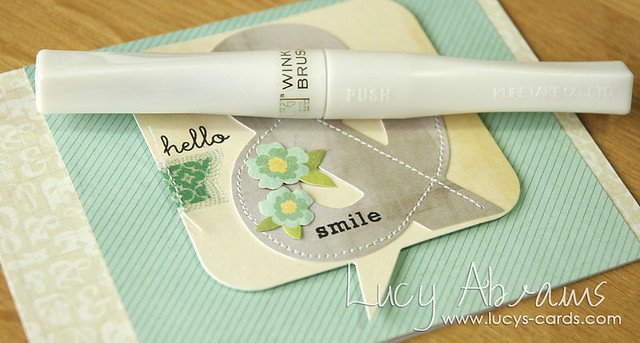
Add some shimmer to the flowers with a Wink of Stella glitter pen.
Adhere the die cut to the card with foam adhesive.
And that's it.
I love adding stitching to my cards… you may have noticed. :) And stitching on die cuts is FUN.
I hope I have inspired you to have a go too.
Have a lovely day, I'll be back tomorrow with Day 5: Using Up Scraps.
Supplies


7 comments:
Thanks for sharing your design process! Gorgeous, Jo x
your stitching looks so good x
Lucy, thank you SO much for these classes. They are so inspiring and I can't wait to try out some of your techniques. I am definitely going to have to buy some Mr Huey's…..it appears to be a staple resource of yours!! xx
AMAZING!! I am always wowed by your design and stitching skills! This is no exception! I shall share your post over V. V. Challenge! Thanks in advance!
love tutorials thanks dear
Love this & really enjoying the tutorials!
Amazing stitching - love it, Lucy! Thanks as well for the recommendation on scissors as I have been struggling to find a decent pair :)
Post a Comment