
It's Day 3 of my 3rd Use It! class.
And just a quick recap of the supplies I am using this week:
Simon Says Stamp's You're Expecting stamp set
Amy Tangerine's Cut & Paste Die Cut Shapes
Lesson 3 - Die Cut Stencils
There are some super cool die cut shapes out there, and in the Cut & Paste set, there are some with words and shapes cut out of them. Very cool. And it got me thinking… I could use them as stencils. Yay. I'm pretty into stencils at the moment, and thought it would be fun to try this out for this class.
So…
Creation
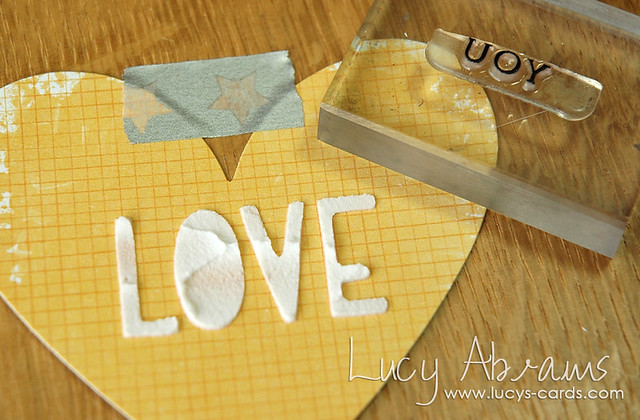
I love the idea of this 'Love This' die cut, but wasn't sure how to use it on a card. So I decided to use just the 'Love' part as a stencil.
Lesson 3 - Die Cut Stencils
There are some super cool die cut shapes out there, and in the Cut & Paste set, there are some with words and shapes cut out of them. Very cool. And it got me thinking… I could use them as stencils. Yay. I'm pretty into stencils at the moment, and thought it would be fun to try this out for this class.
So…
Creation
I love the idea of this 'Love This' die cut, but wasn't sure how to use it on a card. So I decided to use just the 'Love' part as a stencil.
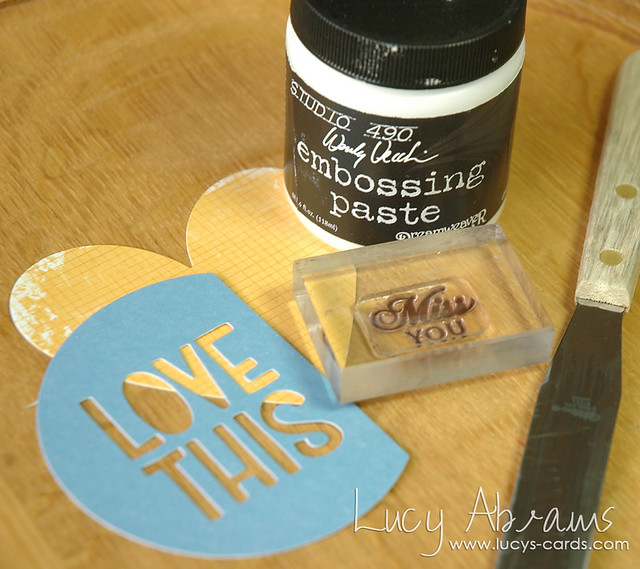
Adhere the 'Love This' die cut to the heart die cut with washi tape.
Apply white embossing paste thickly. Don't smooth it too much.
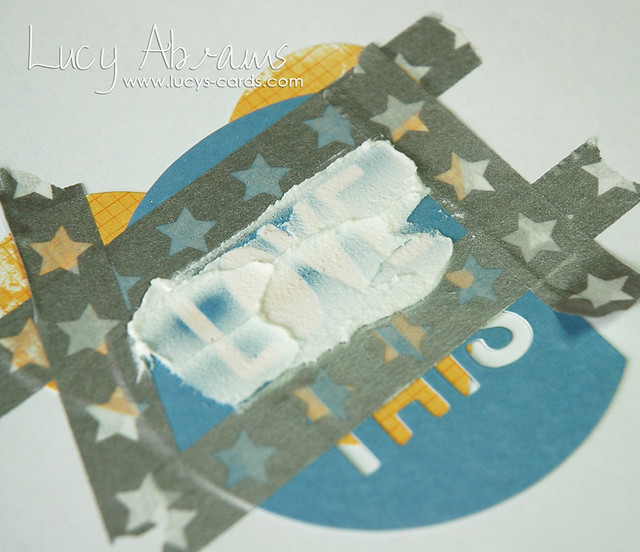
Remove the 'stencil' and leave the heart to dry.
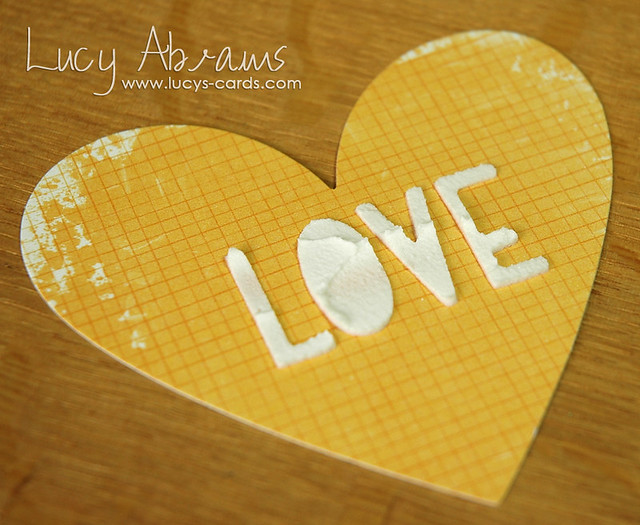
Once dry, adhere the heart to your work surface to prevent it slipping then stamp 'You' underneath in black ink.
(Note: I cut up my stamp… you could of course just mask it, but as I had embossed first, I would not have been able to mask… silly me. Having said that, I am not averse to a bit of stamp trimming. I do it often.)
Adhere a strip of vellum tape to a 5 1/2 x 4" panel of woodgrain card stock. Add a line of stitching and pull the threads out at the top.
Adhere the woodgrain panel to a folded card, then adhere the heart die cut.
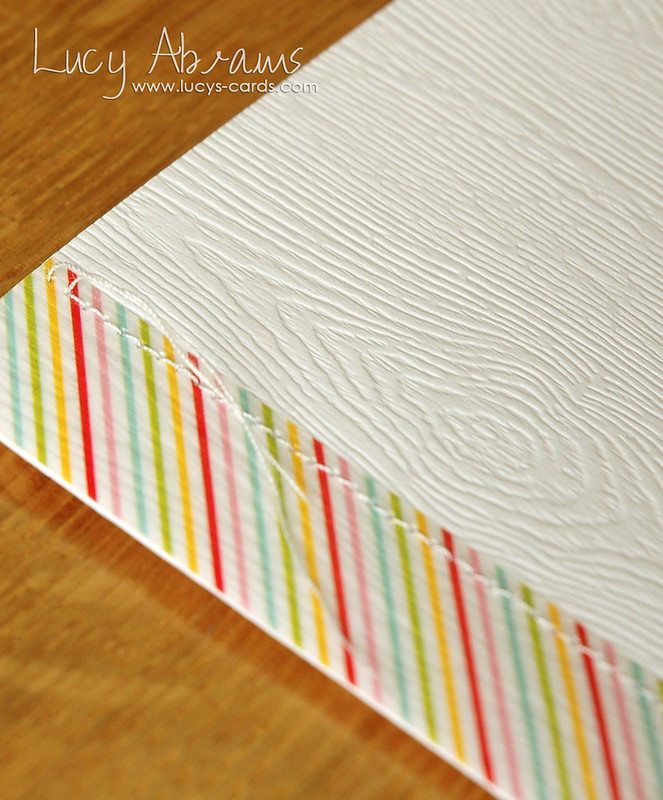
And you're finished.
Another way to stretch your supplies.
I'll be looking at all my die cut shapes now to see if I can use them as stencils :)
Right. Tomorrow it's Lesson 4: Layering Die Cuts.
I hope you can join me then.
Supplies


5 comments:
Thanks for sharing these clever ideas Lucy!! And that's one very cute card!!!
simple yet i wouldn't have thought to do it!
Your selective embossing looks great - another clever twist on using supplies creatively !
oooh i love this. I've never used any sort of paste so I think i'll have to buy some so i can give this a try x
Gorgeous!! I adore the unevenness of the sentiment from embossing paste!!
Post a Comment