
It's time for Day 3 of my 2nd Use It! class.
Here's a reminder of the supplies I am using this week:
Lots of Dots Stamp Set by Simon Says Stamp
Head Over Heels 6 x 6 Pad by Echo Park
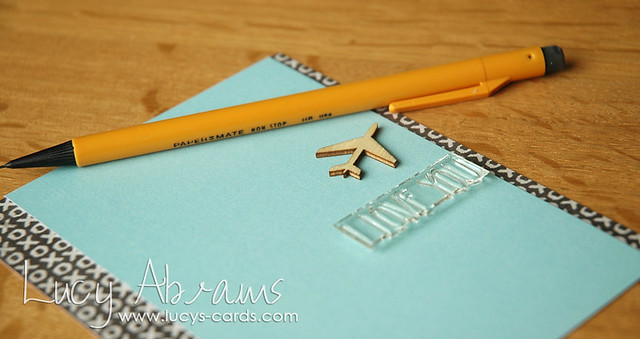
Transportation Wood Veneer Shapes by Studio Calico
Head Over Heels 6 x 6 Pad by Echo Park
Transportation Wood Veneer Shapes by Studio Calico
Lesson 3 - Hand Stitching
OK, I admit… I rarely hand stitch on my cards. My sewing machine is my best buddy. :)
But for today's card, I wanted a different look…
Creation
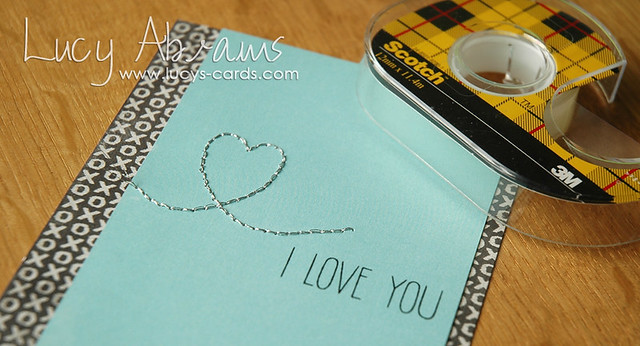
Trim XOXO patterned paper to 5 1/2 x 4" and adhere to a folded card cut to the same size.
Trim turquoise paper to 5 1/2 x 3 1/2".
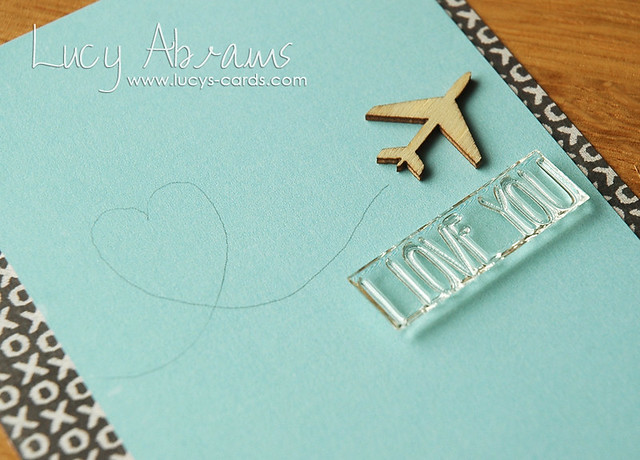
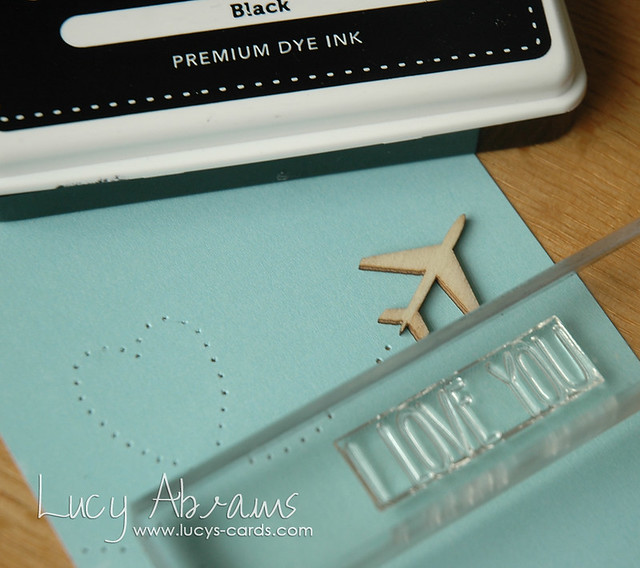
Arrange the sentiment and wood veneer plane on the page until you have the position you like.
But for today's card, I wanted a different look…
Creation
Trim XOXO patterned paper to 5 1/2 x 4" and adhere to a folded card cut to the same size.
Trim turquoise paper to 5 1/2 x 3 1/2".
Arrange the sentiment and wood veneer plane on the page until you have the position you like.
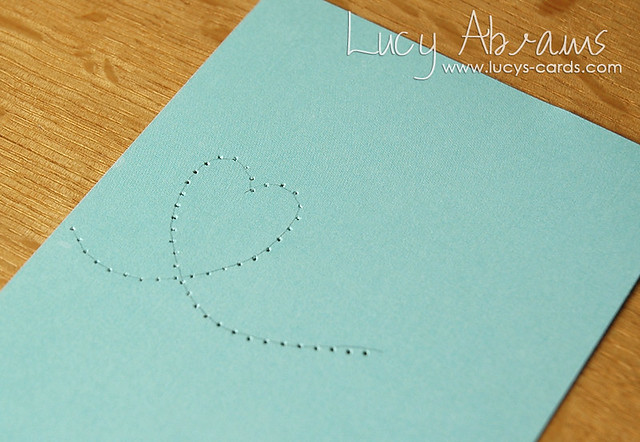
Hand draw a heart shaped vapour trail behind your plane. Don't worry if it's not perfect, it does not need to be. :)
Use an unthreaded sewing machine to punch holes along the paper line. If you don't have a sewing machine, just use a needle through the paper onto a cork board or cutting mat.
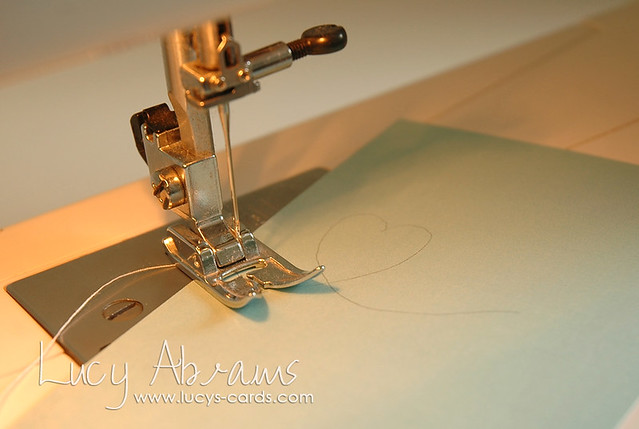
One completed, erase the pencil line.
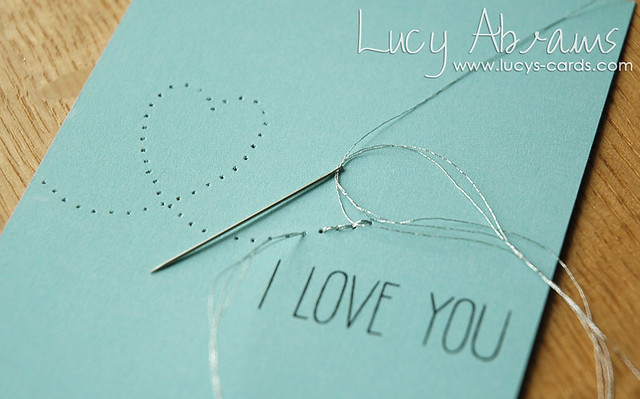
Stamp the sentiment in black ink. TIP - it's worth stamping your sentiment BEFORE you complete the time consuming hand stitching, just in case you mess it up and have to start again. :) This is exactly the kind of thing I often do… spend hours on one part of a card only to drop my ink pad onto it whilst trying to stamp a perfect sentiment...
Thread your needle with three strands of metallic thread. The triple thickness works brilliantly and gives a much chunkier stitched effect.
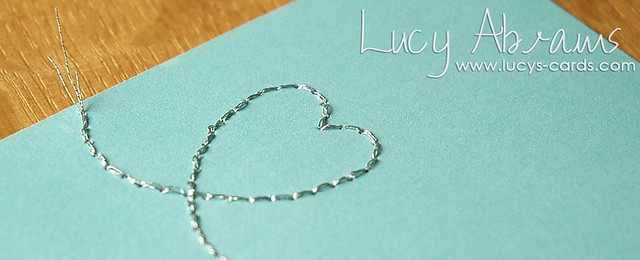
Stitch the trail using backstitch.
Trim the ends at different lengths and adhere the stitching on the reverse.
Adhere the turquoise panel to the card. I use Scotch double sided adhesive and love it.
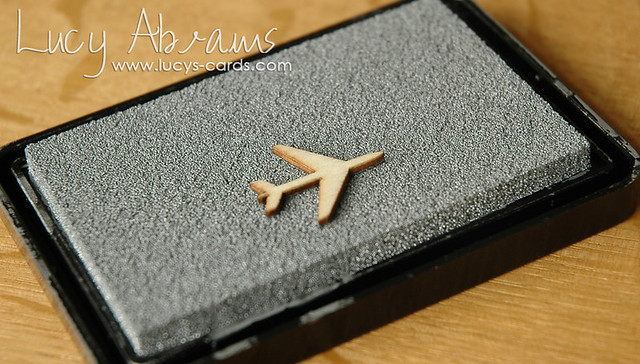
Finally, press the wood veneer aeroplane into a Silver Shadow Ink pad. Carefully remove and leave to dry.
Adhere the aeroplane to the card and you are done.
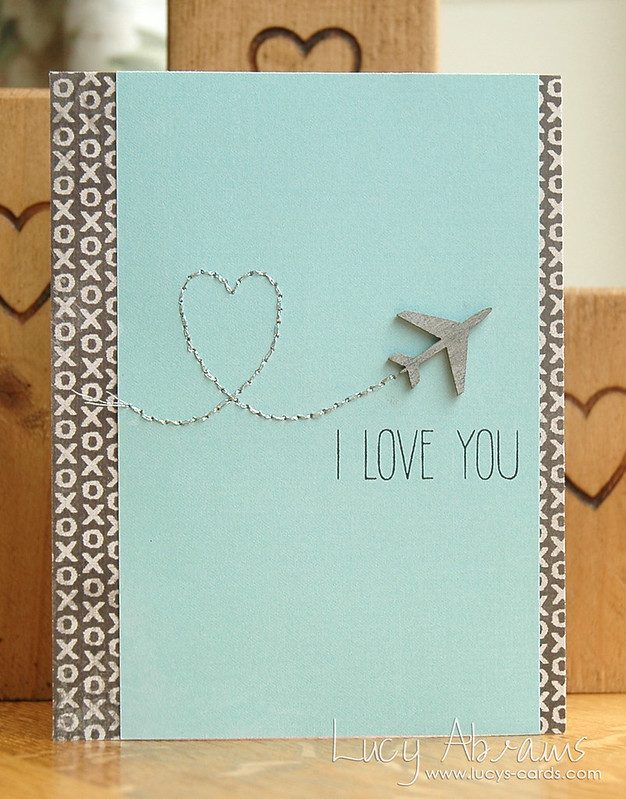
A clean and simple masculine card with a touch of glitter and shine. :)
Right - I'll be back tomorrow with Lesson 4 - Wiggle Eyes. :) :) :)
Supplies


16 comments:
I am really loving this class series, Lucy! The silver hand stitching looks awesome!
You are so talented Lucy! Thanks for a great class, Jo x
This is brilliant! I love that you are doing a second class. Your first was FAB!
That silver handstitched heart trail is so super cute! And I know what you mean about stamping the sentiment---I have done that so many times too!!! Lesson learned!
What a fab idea to use a machine to make the holes! Super card. I must look ou for the wood veneers x x
Wow !! Terrific ! You're so talented ! Thank you very much to share your tips !
Fabulous CAS design!! Thanks for lessons!!
I'm so tempted to buy wood veneers now. I had no idea it was so simple and easy to colour them! Does the same trick work with smaller ink pads and larger veneers? Also, what do you use to adhere the veneers? Thank you :)
Love the hand stitching - it adds great texture to this great CAS design!
I agree, BRILLIANT!!!! I am truly inspired to use my supplies now!
Best tip yet-stamp, then stitch. Awesome card too.
Love this! Love your class series too. Thanks for creating them.
Gorgeous Lucy. Love seeing the same stamps and embellishments in such different ways.
Great tip about stamping first, before all the hard work. I might have done this backwards more than once, and ruined a time-consuming project with a poorly stamped sentiment.
LOVE the silver trail!
Super cute card! Love the silver thread!
This is brilliant, Lucy! I am hosting the challenge here and will share your awesome stitching tutorial and links in upcoming posts. Hope you don't mind :) Thanks in advance! http://virginiasviewchallenge.blogspot.ca/
Post a Comment