
Hello again.
HERE'S the link to the PDF for yesterday's tutorial.
HERE'S the link to the PDF for yesterday's tutorial.
Today, I'm going to share my method of digi stamping in white. I'll also be sharing my ways of altering the colour of digital papers.
But first, I need to show you how I mask with digital stamps.
Sometimes, you don't want the whole image or sentiment in a digital stamp. With real stamps, you can just mask the stamp with paper or a post-it note. This is a bit harder in Word, but it can be done. :)
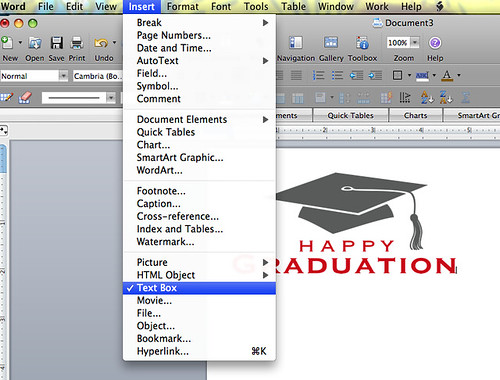
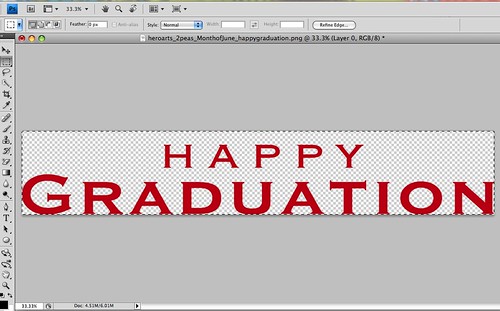
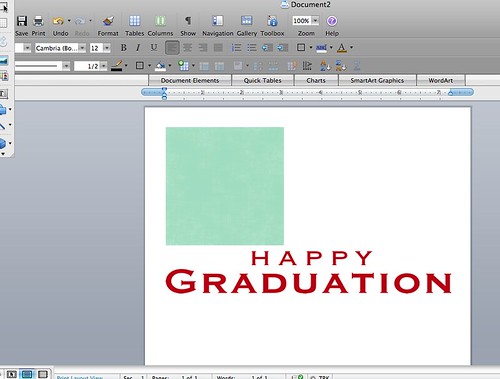
First, import the stamp (this one is from The Month of June digikit), then insert a text box:
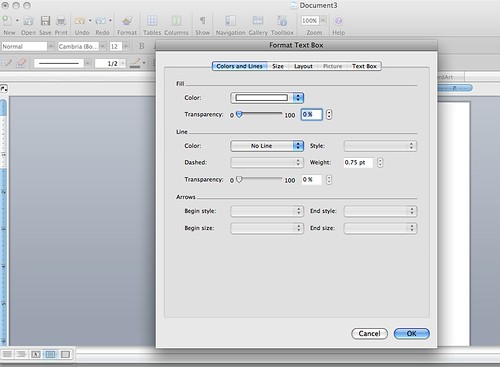
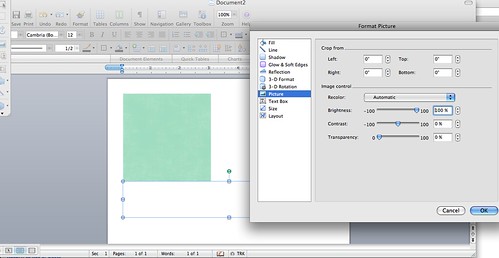
Format the text box so that it is filled in white to match the background.
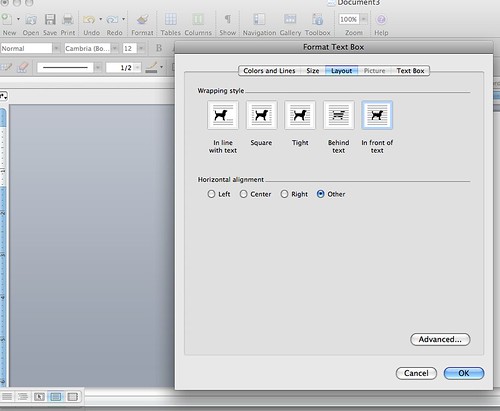
Then alter the layout to In Front of Text:
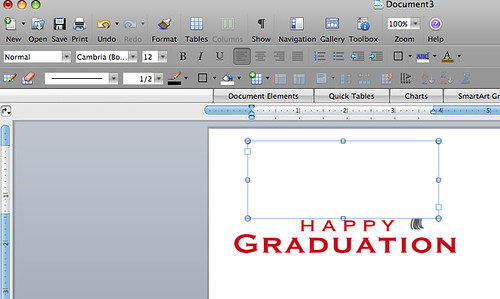
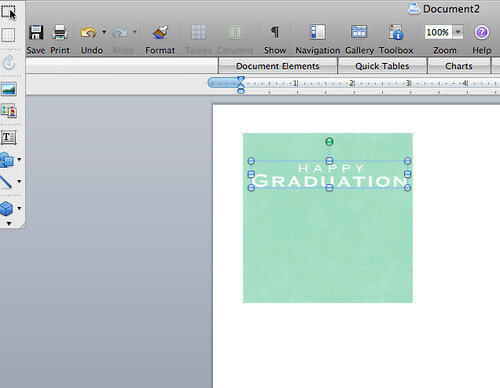
This will give you a solid image over your stamp. You can then move this around to cover the bit of your stamp you do not want.
Create a second text box to cover any bits that don't fit behind the first box.

This way you can alter your images to fit your project.
It's not the best... you keep having to move the text boxes as you move the stamp around on the page... but it's better than nothing.
If you have Photoshop, this process is much easier. I am using Adobe Photoshop CS4.
Open your image and select the Eraser Tool.
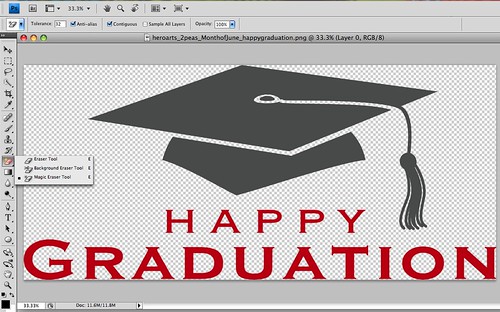
You can either use the regular Eraser:
You can either use the regular Eraser:
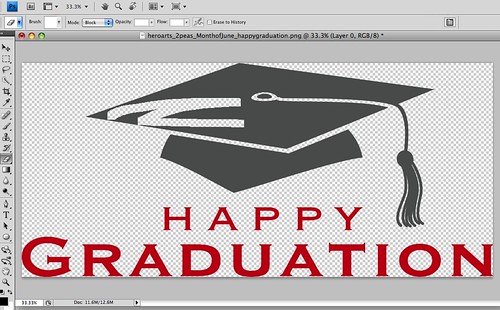
Or the Magic Eraser which clears whole solid areas at once. Very useful:
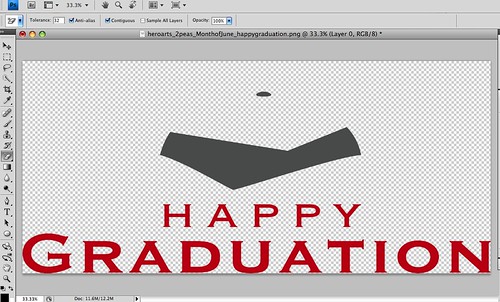
Then use the selection tool to highlight the bit you want:
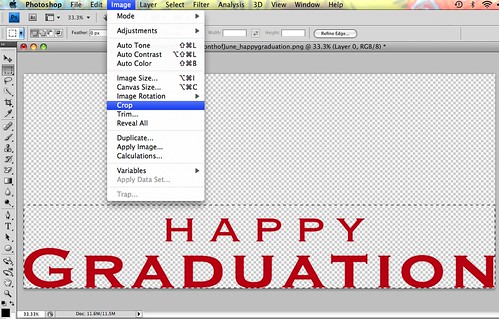
And crop:
Voila!
Next, stamping in white.
I love the look of a white image or sentiment on a coloured background. Usually this is achieved with a crisp white ink, or white embossing. With digital, you can do this easily.
First, choose your background colour or paper. For my card, I chose a Robins Egg paper from Echo Park's Springtime Paper Pack No 1. Resize the paper according to the size of your project, then import your digital stamp:
Format the stamp, and change the brightness to 100%. Your stamp will disappear :)
Make sure the stamp is set to In Front of Text, resize and layer over your coloured paper.
And there you have it. A lovely soft effect.
Format the stamp, and change the brightness to 100%. Your stamp will disappear :)
Make sure the stamp is set to In Front of Text, resize and layer over your coloured paper.
And there you have it. A lovely soft effect.
For my card, I copied and pasted the sentiment a number of times, then added a star from the 'A Star is Born' digikit, before printing and cutting out.
Finally for today, changing the colour of digital papers. For my card, I used a sweet paper from Echo Park's Holly Jolly digikit. The paper was originally a dark turquoise shade and I wanted pink. :)
I am using Word 2008 and I am not sure if this feature is available in earlier versions.
Finally for today, changing the colour of digital papers. For my card, I used a sweet paper from Echo Park's Holly Jolly digikit. The paper was originally a dark turquoise shade and I wanted pink. :)
I am using Word 2008 and I am not sure if this feature is available in earlier versions.
Import the paper, then Format picture. Click on Picture. You can see lots of options here. Change the Accent Color:

Then, to alter further, play with the contrast:
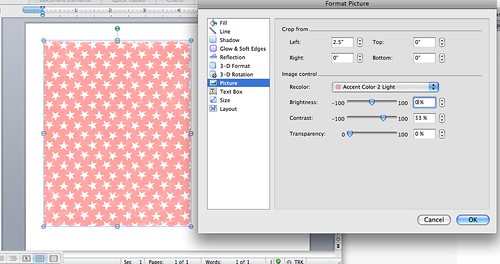
And there you go - turquoise to pink in a few easy steps. :)
And here is my finished card. I added a typed sentiment and some silk ribbon to create a fun sash for my star grad.

I hope you enjoyed today's tutorial - what a long one!
More to come...
Then, to alter further, play with the contrast:
And there you go - turquoise to pink in a few easy steps. :)
And here is my finished card. I added a typed sentiment and some silk ribbon to create a fun sash for my star grad.
I hope you enjoyed today's tutorial - what a long one!
More to come...
Supplies
11 comments:
THAnk you so much, Lucy, for these tutorials....I can't try them until I get back home to Word, but they are being bookmarked for then. Hugs to you and your little Lily!
OH this card is so pretty! Thanks SO much for taking the time and effort to put this information together and post as well as create PDF's too! I am excited to go and try if I can do this too! :) More to come? Heavenly!
Love that the tutorials are in word. This means most everyone can use them.
Thanks so much Lucy! I've been looking at digital for some time, and you've convinced me to jump in and try!
These are my fave tips so far, thanks so much for all the info!
Thankyou so much, these tutorials are fantastic! Ger x.
In older versions of Word (and in Publisher) you can "format picture" and "recolour" if that helps anybody...
Thanks so much for taking the time to write these tutorials Lucy, they are so helpful. Do you have any tips on how to store your store your images? I often forget what I have and can't decide how best to store them so that I can find them quickly! Have a great weekend. Tracey x
LOVE your tutorials Lucy. You have made things so easy to understand and follow.
I've always struggled to recolour, never knew about the accent colour thing, will have to give it a go!!!
Another great tutorial! Thank you! You sure know how to get the max out of Word. Love it!
Post a Comment